- DIRECT CONTACTS:
- +256394517569
- tours@safarioclock.africa
How to Photograph Dark Fur Against Green Forest Backgrounds

Should You Use a Smartphone or Camera for Gorilla Trekking?
November 11, 2026
How to Prepare Camera Batteries for a Long Trek
November 11, 2026
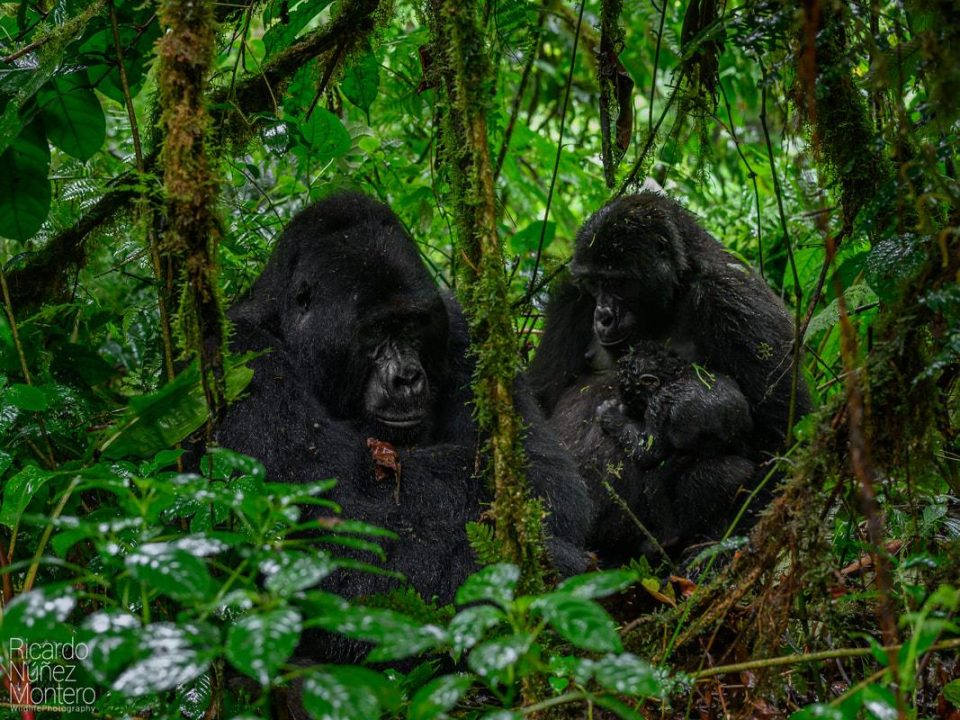
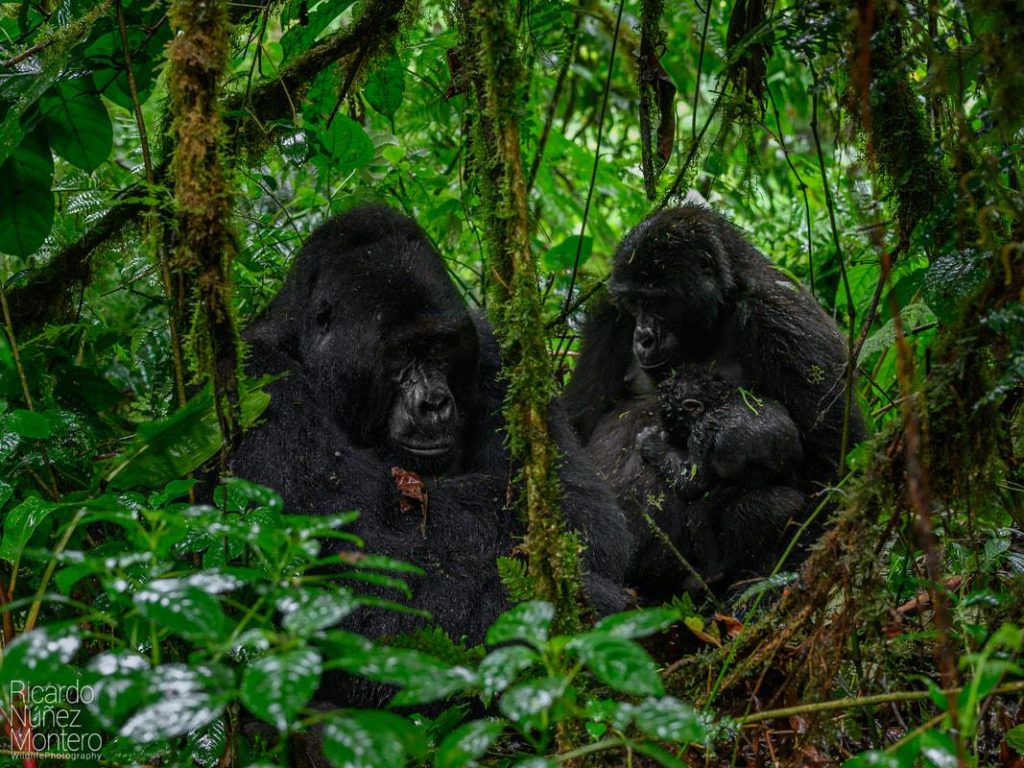
Photographing mountain gorillas in their natural forest habitat is an unforgettable experience. However, capturing clear and well-balanced images can be challenging. Mountain gorillas have dark fur, while their surroundings often contain bright green leaves, patches of sunlight and deep forest shadows. This combination can make it difficult to capture both the animal and its environment clearly.
Sometimes, the gorilla appears almost black in the photograph. In other images, the green background looks too bright, while the animal loses important details. These problems often happen because the camera struggles to balance different levels of light within one scene.
Fortunately, a few photography techniques can help you achieve better results. Understanding exposure, choosing the right metering mode and paying attention to natural light can make a significant difference.
For travellers preparing for a gorilla safari, Safari O’clock encourages learning basic wildlife photography skills before entering the forest. Good preparation allows you to spend less time adjusting your camera and more time enjoying the encounter.
Why Photographing Dark Fur Against Green Backgrounds Is Difficult
Mountain gorillas have thick, dark coats that can absorb much of the available light. Their forest surroundings, however, may contain bright leaves, open spaces and sunlight filtering through the canopy. As a result, the camera must deal with several brightness levels in one photograph.
For example, imagine a gorilla sitting beneath a shaded tree while bright green leaves appear behind it. Your camera may try to balance the entire scene. Consequently, the gorilla’s face and fur may appear too dark.
The opposite problem can also happen. If the camera brightens the dark fur too much, the lighter parts of the forest may lose their natural colour and detail.
This is a common challenge in wildlife photography. It becomes even more noticeable in tropical rainforests, where sunlight changes as clouds move and leaves shift above the animals.
The goal is not simply to make the gorilla brighter. Instead, you want to preserve the natural appearance of its fur while keeping enough detail in the surrounding forest.
Understanding Light When Photographing Dark Fur
Before changing your camera settings, take a moment to study the available light. Notice where the light falls on the gorilla and how it affects the background.
Soft, natural light is often easier to work with than strong direct sunlight. It creates smoother transitions between bright and dark areas. It can also reveal the texture of the gorilla’s coat without producing harsh highlights.
However, forest lighting can change quickly. A gorilla may move from an open space into deep shade within seconds. Therefore, avoid assuming that one camera setting will work throughout the encounter.
Watch the direction of the light as well. When light falls gently across the gorilla’s face, it can reveal the texture around the eyes, nose and cheeks. This often creates a more interesting photograph than completely flat lighting.
If the background is much brighter than the gorilla, adjust your camera exposure carefully. Do not sacrifice the animal’s facial details just to make the leaves look perfectly exposed.
Camera Settings for Photographing Dark Fur Against Green Backgrounds
The right camera settings help you manage difficult lighting conditions. However, there is no single setting that works in every forest situation. Your choices should depend on the available light, the movement of the gorilla and your camera equipment.
Use the Right Exposure for Dark Fur
Exposure controls how much light reaches your camera sensor. It affects how bright or dark the final photograph appears.
When photographing dark fur, pay close attention to the gorilla’s face and coat. You want to retain visible texture rather than turn the animal into a featureless dark shape.
Start with your camera’s normal exposure setting. Then review the photograph and adjust if necessary. If the gorilla appears too dark, you may need to increase exposure slightly. However, check the brighter leaves to ensure they do not become completely washed out.
Exposure compensation can help when using an automatic or semi-automatic shooting mode. A small adjustment can improve the result, but the correct direction depends on how your camera measures the scene.
For example, a camera that prioritises a bright background may leave the gorilla underexposed. In that situation, a little positive exposure compensation may help. Always review the image before making further changes.
Choose a Suitable Metering Mode
Metering tells your camera how to measure the light in a scene. This setting matters when a dark animal sits against a brighter background.
Evaluative or matrix metering considers much of the frame when calculating exposure. It can work well when the lighting is reasonably balanced.
Spot metering measures a smaller selected area. This can help when the gorilla’s face is your main subject. However, it requires care because measuring a very dark area can cause the camera to brighten the entire photograph.
Centre-weighted metering gives greater importance to the central part of the frame. It may also be useful when the gorilla occupies the centre of your composition.
Try different metering modes before your safari. Learn how your camera responds to dark subjects and bright backgrounds. This preparation will help you make quicker decisions during the encounter.
Adjust ISO for Forest Lighting
ISO controls how sensitive your camera sensor is to available light. A higher ISO allows you to use faster shutter speeds or smaller apertures in darker conditions.
Forest environments often have limited natural light. Therefore, you may need to increase ISO to capture a sharp image without using flash.
However, very high ISO settings can introduce digital noise. This noise may appear as grain or coloured speckles, especially in dark areas of the photograph.
Choose an ISO that allows you to maintain a suitable shutter speed while keeping image quality acceptable. Modern cameras handle higher ISO levels differently, so practise with your own equipment before travelling.
Remember that a slightly noisy photograph with clear details is often better than a clean