- DIRECT CONTACTS:
- +256394517569
- tours@safarioclock.africa

How to Photograph Mountain Gorillas Without Using Flash

Responsible Souvenir Shopping Around Volcanoes National Park
November 11, 2026
Camera Settings to Practise Before Your Rwanda Gorilla Trek
November 11, 2026
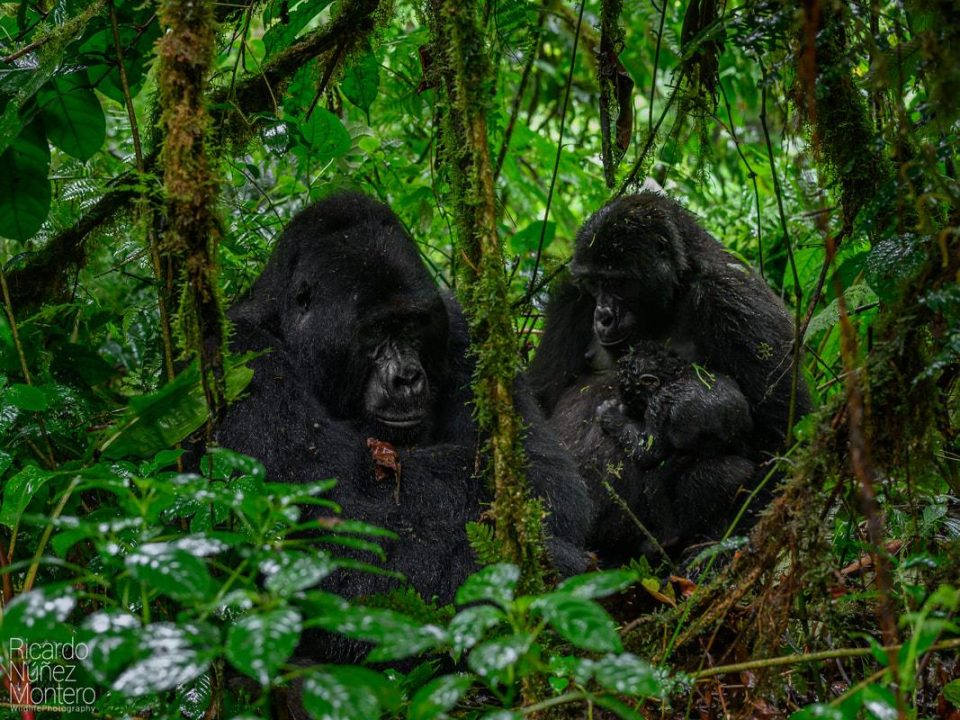
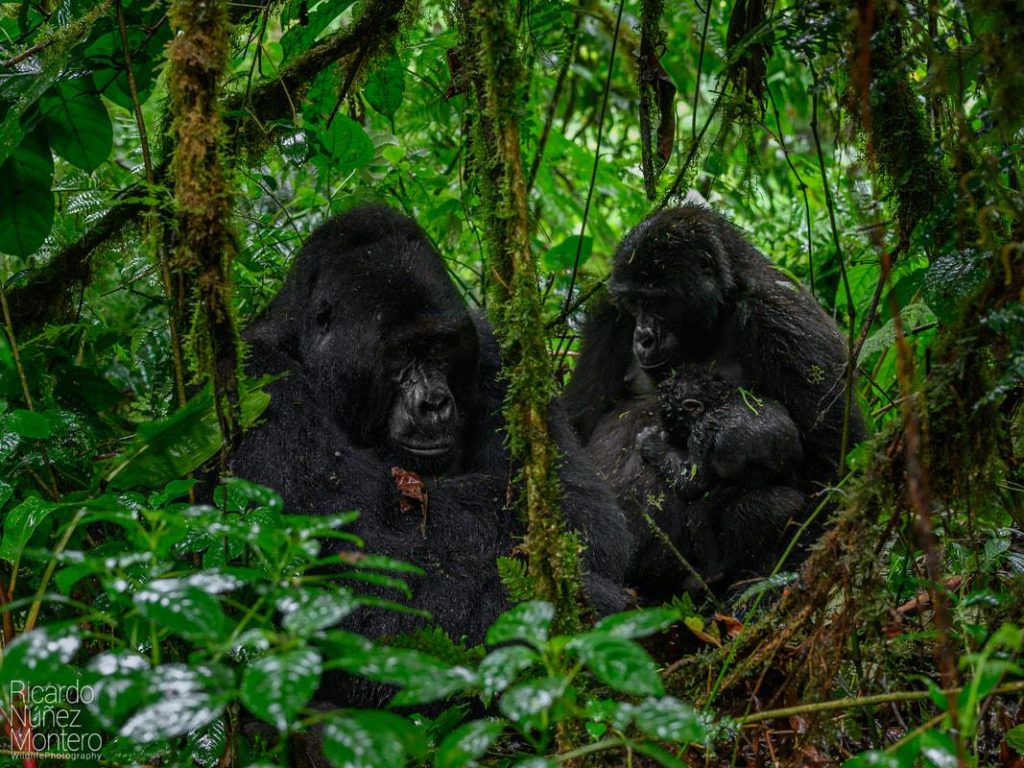
Photographing mountain gorillas is one of the most memorable parts of a gorilla tracking experience. Watching a silverback resting in the forest or a young gorilla playing beside its family creates moments that many travellers want to capture. However, taking good photographs requires preparation, patience and respect for wildlife.
Mountain gorillas live in forest environments where natural light can be limited. Thick vegetation, cloudy skies and tall trees often create challenging photography conditions. As a result, some visitors may feel tempted to use flash to brighten their pictures. However, flash photography is not allowed during gorilla visits.
The good news is that you can take beautiful photographs without using artificial light. With suitable camera settings, a steady hand and a little preparation, you can capture memorable images while respecting the animals.
At Safari O’clock, we encourage travellers to enjoy photography responsibly. The best gorilla photographs should preserve the beauty of the encounter without disturbing the animals or breaking park regulations.
Why Gorilla Photography Must Be Flash-Free
Before preparing your camera, understand why gorilla tracking authorities prohibit flash photography. Mountain gorillas are wild animals, and visitors must avoid behaviour that may disturb them.
The Rwanda Development Board clearly states that visitors may take photographs during gorilla tracking but must not use flash. This rule forms part of the wider guidelines designed to protect gorillas during human encounters.
A sudden burst of light can startle an animal and interrupt its natural behaviour. It may also distract the gorillas during an encounter. Therefore, visitors should rely on natural forest light instead of artificial flashes.
The rule also reminds travellers that wildlife photography is different from taking pictures at home or in a studio. You cannot control the lighting, move the subject or ask an animal to pose. Instead, you must adapt your photography to the environment.
Safari O’clock encourages visitors to make responsible photography a priority. A good photograph should never come at the expense of an animal’s comfort or safety.
Prepare Your Camera Before Gorilla Tracking
Good gorilla photography begins before you enter the forest. Preparing your equipment in advance allows you to concentrate on the experience rather than struggling with camera settings.
First, check your camera’s flash settings. Disable automatic flash and confirm that the camera will not activate it when the light becomes poor. Some cameras automatically switch to flash mode in dark environments. Therefore, check this setting before the trek.
If your camera has an autofocus-assist lamp or video light, check the equipment instructions and ensure you do not use artificial illumination near the gorillas. Follow the guide’s instructions about all camera equipment.
Next, charge your batteries fully. Cold and wet conditions can affect equipment performance. Carry a spare battery in a protective case if your camera supports removable batteries.
You should also prepare your memory card. Make enough storage space for photographs and short video clips. There is nothing more frustrating than running out of storage during an important wildlife encounter.
Finally, practise using your camera before the trek. Learn how to adjust ISO, shutter speed and aperture. You should also know how to switch between autofocus modes without spending too much time looking at the camera menu.
Choose the Right Camera Settings for Gorilla Photography
One of the biggest challenges of gorilla photography is capturing clear images in low light. Since flash is prohibited, your camera must make the best use of the available natural light.
Three important settings help you achieve this: ISO, shutter speed and aperture. Understanding how they work together can improve your photographs.
Use a Higher ISO for Gorilla Photography
ISO controls how sensitive your camera sensor is to light. A higher ISO helps your camera capture brighter images when the forest is dark.
For example, a camera using ISO 400 may produce a darker image than one using ISO 1600 under the same lighting conditions. Increasing ISO can therefore help you photograph gorillas without flash.
However, very high ISO settings can introduce digital noise. This appears as grain in the photograph and may reduce image detail.
The best approach is to adjust ISO according to the available light and your camera’s performance. Modern cameras often handle higher ISO values better than older models.
If you are unsure which setting to use, try Auto ISO with a suitable upper limit. This allows the camera to adjust sensitivity as the light changes.
Select a Suitable Shutter Speed
Shutter speed determines how long your camera sensor receives light when taking a photograph. It also affects how movement appears in your images.
Gorillas do not remain still throughout the encounter. They feed, walk, interact and sometimes move suddenly. A very slow shutter speed can therefore create blurred photographs.
A shutter speed around 1/250 of a second can be a useful starting point when photographing relatively active gorillas. You may need a faster speed when capturing sudden movement.
However, the correct setting depends on the available light, lens and camera stability. Faster shutter speeds allow you to freeze movement, but they also reduce the amount of light entering the camera.
If the forest becomes darker, you may need to increase ISO or use a wider aperture to maintain a suitable shutter speed.
Open the Aperture to Allow More Light
Aperture refers to the opening inside your camera lens. It controls how much light reaches the camera sensor.
A wider aperture allows more natural light into the camera. This makes it useful when photographing mountain gorillas under thick forest vegetation.
For example, a lens with an aperture of f/2.8 allows more light through than one set at f/5.6.
A wide aperture can also create a softer background. This helps the gorilla stand out from surrounding leaves and branches.
However, very wide apertures produce a shallow depth of field. This means some parts of the image may appear out of focus. When photographing several gorillas at different distances, choose an aperture that keeps the important subjects sharp.
Use Natural Light to Improve Gorilla Photography
Natural light plays an important role in wildlife photography. Since visitors cannot use flash, they must learn to work with the light available in the forest.
The amount of light can change throughout the trek. Some areas may receive sunlight through gaps in the trees, while others remain heavily shaded.
When possible, look for naturally brighter areas without moving away from the group or disturbing the animals. However, never ask your guide to reposition the gorillas or move closer simply to improve the lighting.
Pay attention to the direction of the light. Soft natural light can reveal details in a gorilla’s face and fur. Meanwhile, strong light behind the animal may create a bright background and a darker subject.
Your camera may struggle with these differences in brightness. Therefore, review a few photographs when appropriate and adjust your exposure if necessary.
Remember that the forest will not always provide perfect lighting. Sometimes, a slightly darker photograph can still preserve the atmosphere of the encounter.
Choose a Suitable Lens for Gorilla Photography
Your lens can make a major difference when photographing mountain gorillas. However, you do not need the largest or most expensive lens to capture meaningful images.
A flexible zoom lens can help you photograph different subjects without changing equipment frequently. For example, a standard zoom lens may capture a gorilla’s face as well as members of the family within the surrounding forest.
A telephoto lens can also help you photograph details from the required viewing distance. However, extremely long lenses may become difficult to use in dense vegetation.
Consider choosing a lens with a wide maximum aperture. Such lenses allow more natural light into the camera and can improve performance in shaded conditions.
You should also consider the weight of your equipment. Gorilla tracking involves walking through forest terrain, sometimes across steep and muddy sections. Heavy camera equipment can make the journey more tiring.
At Safari O’clock, we encourage travellers to choose equipment that suits their experience, comfort and photography needs. A simple camera that you understand well can be more useful than complicated equipment you struggle to operate.
How to Photograph Gorillas Using a Smartphone
You do not need a professional camera to capture memories of mountain gorillas. Modern smartphones can produce impressive photographs, especially when you understand their basic features.
Start by switching off the phone’s flash. Check the camera settings before entering the forest to prevent accidental use.
Next, clean your camera lens. Fingerprints, dust and moisture can reduce image clarity. A soft cleaning cloth can help keep the lens clear.
When photographing a gorilla, tap the screen to focus on the animal. Hold the phone steadily with both hands and avoid unnecessary movement.
If your phone has optical zoom, use it when appropriate. However, avoid excessive digital zoom because it can reduce image quality.
You can also try short video clips if the guide permits photography and filming. Keep the phone steady and avoid using artificial lights.
Some smartphones offer night or low-light modes. These can brighten darker scenes, but they may use longer exposure times. As a result, moving gorillas may appear blurred. Use these modes carefully and prioritise sharp images.
Most importantly, remember that the same wildlife rules apply whether you use a smartphone or a professional camera.
Maintain the Required Distance While Taking Photographs
One of the most important responsibilities during gorilla photography is maintaining the required distance from the animals.
Visitors must not move closer to gorillas simply because they want a better photograph. The distance rule helps reduce disease transmission risks and limits disturbance.
Rwanda’s gorilla tracking guidance has traditionally required visitors to maintain at least seven metres from the gorillas. However, visitors should always follow the latest instructions from park authorities and their guides.
Use your camera’s zoom to capture details rather than approaching the animals. If a gorilla moves closer to the group, remain calm and follow the guide’s instructions.
Never reach out to touch a gorilla, even if it comes near you. Also, avoid sudden movements when raising or lowering your camera.
The guide’s instructions must always come before your photography plans. If the guide asks visitors to stop taking pictures or change position, respond immediately.
Safari O’clock encourages travellers to understand that responsible photography protects both the gorillas and the quality of the wildlife experience.
Take Clear Photographs Without Disturbing the Gorillas
Good photography is not only about camera settings. Your behaviour also affects the quality of the photographs and the experience of other visitors.
First, remain quiet. Loud conversations and unnecessary noise can disturb wildlife. Keep your voice low and listen carefully to the guide.
Second, avoid sudden movements. Raising your camera slowly and keeping your body steady can help you photograph without drawing unnecessary attention.
Third, avoid blocking other visitors. Everyone in the tracking group should have an opportunity to observe the gorillas. Be considerate when choosing your position.
If vegetation blocks your view, do not break branches or clear plants yourself. Ask your guide for advice and follow their decision.
You should also avoid spending the entire encounter looking through your camera. Take a few photographs, then lower your camera and observe the gorillas directly.
The encounter is much more than an opportunity to collect pictures. Watching a mother care for her infant or a young gorilla play with its family can create memories that no camera can fully capture.
Protect Your Camera During a Gorilla Trek
The forests around Volcanoes National Park can be wet, muddy and humid. These conditions require careful handling of photography equipment.
Carry a waterproof camera cover or protective bag. This helps protect your equipment from rain and moisture.
A soft lens cloth is also useful. Mist and rain can leave water droplets on your lens, affecting image quality.
Keep spare batteries and memory cards in secure, dry compartments. Avoid leaving your equipment exposed when you are not using it.
If you carry a camera bag, choose one that is comfortable and easy to access. You should be able to reach your camera without delaying the group or making unnecessary movements.
A porter can help carry your larger bag during the trek. However, keep essential equipment within easy reach and follow your guide’s instructions about what you may carry during the encounter.
Good preparation reduces the risk of equipment damage and helps you enjoy the trek with fewer distractions.
Common Gorilla Photography Mistakes to Avoid
Even experienced photographers can make mistakes when photographing wildlife. Understanding common problems before the trek can help you avoid them.
One common mistake is leaving automatic flash switched on. A camera may activate it when the forest becomes dark. Always check the settings before the encounter.
Another mistake is using a shutter speed that is too slow. This can create blurred images when gorillas move. Adjust your settings according to the activity and lighting conditions.
Some visitors also rely too heavily on digital zoom. Excessive zoom can reduce image quality, especially on smartphones. Instead, use suitable optical zoom when available.
Moving closer to improve a photograph is another serious mistake. Always maintain the required distance and follow your guide.
Finally, avoid spending every moment taking pictures. Photography should support your experience, not replace it.
Make Every Gorilla Photograph a Responsible Memory
Photographing mountain gorillas without flash is possible when you prepare well and understand your camera. By adjusting ISO, choosing a suitable shutter speed and using a wide aperture, you can work with natural light in the forest.
However, technical knowledge is only one part of responsible wildlife photography. Visitors must also maintain the required distance, remain quiet and follow the instructions of their guides.
At Safari O’clock, we believe that a successful gorilla tracking experience combines unforgettable memories with respect for wildlife. Travellers should enjoy capturing photographs while remembering that the gorillas deserve a calm and undisturbed environment.
When you finally stand before a mountain gorilla family, take a few thoughtful photographs. Then put your camera down and appreciate the moment. The best memory of your gorilla encounter may not be the photograph you take, but the experience you carry home.