- DIRECT CONTACTS:
- +256394517569
- tours@safarioclock.africa

Photographing Gorillas Through Dense Vegetation: Practical Tips

How to Compose Wildlife Images When Space Is Limited
November 19, 2026
How to Store Photos Safely During a Rwanda Safari
November 19, 2026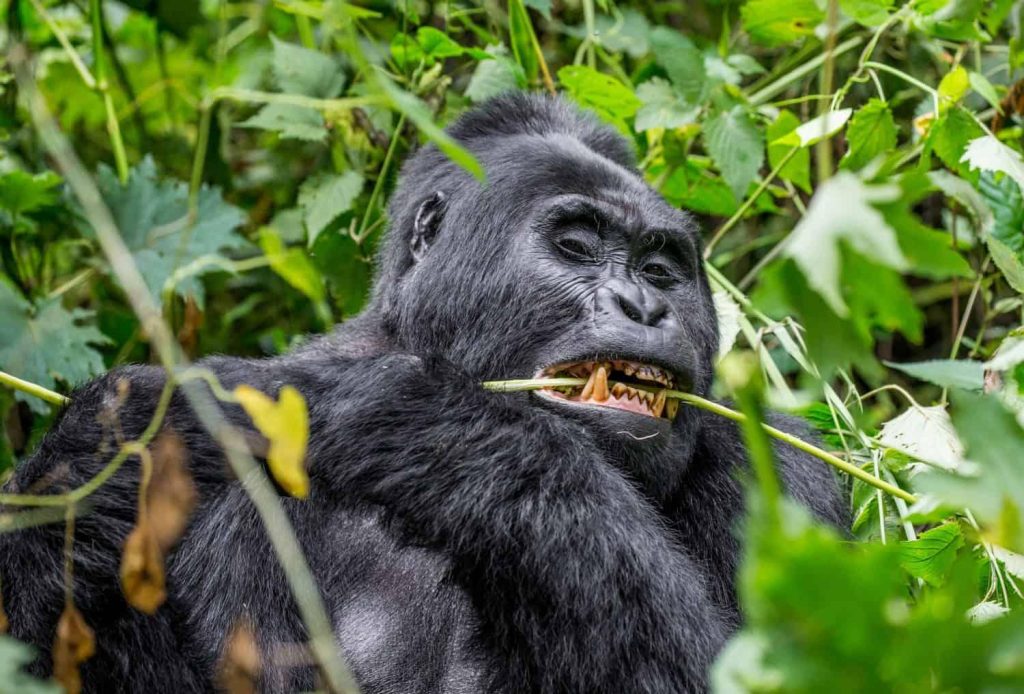
Photographing mountain gorillas in their natural habitat is an unforgettable wildlife experience. However, capturing clear and beautiful images is not always easy. Mountain gorillas live in thick tropical forests where leaves, branches, vines and tall plants often obstruct the photographer’s view. Even when a gorilla is only a short distance away, surrounding vegetation can make it difficult to capture its face, eyes and natural behaviour.
Unlike wildlife photography in open savannahs, gorilla photography requires visitors to work with the forest environment. Photographers cannot freely move around, remove branches or approach the animals whenever they want. They must also follow the instructions of park guides and respect the rules that protect mountain gorillas.
Fortunately, dense vegetation can also create unique photographic opportunities. Leaves can provide natural framing, forest openings can reveal beautiful compositions, and filtered sunlight can add atmosphere to wildlife photographs. With patience, proper camera settings and careful observation, visitors can capture remarkable images without disturbing the animals.
At Safari O’clock, we encourage travellers to appreciate the beauty of mountain gorillas while respecting their natural environment. Whether you are visiting Bwindi Impenetrable National Park or Mgahinga Gorilla National Park in Uganda, the following tips will help you improve your gorilla photography experience.
Understanding the Challenges of Photographing Gorillas Through Dense Vegetation
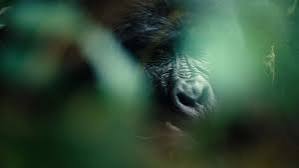
Mountain gorilla habitats contain thick vegetation that creates several challenges for wildlife photographers. Large trees, climbing plants, shrubs and overlapping leaves often block parts of the animals’ bodies. Sometimes, only a gorilla’s face or a small section of its body is visible through the forest.
Lighting is another major challenge. The forest canopy limits the amount of sunlight reaching the ground. As a result, photographers may encounter dark conditions even during the middle of the day. Bright sunlight can also enter through small openings, creating strong differences between light and shadow.
Autofocus presents an additional problem. Modern cameras can recognise animals and track their eyes. However, when leaves and branches appear between the camera and the gorilla, the autofocus system may select the vegetation instead of the animal.
Movement also makes photography difficult. Gorillas feed, walk, groom, rest and interact with other family members. They rarely remain in one position for long. Therefore, photographers need to understand their equipment and prepare before the encounter begins.
Understanding these challenges helps visitors make better decisions. Instead of expecting a completely clear photograph every time, learn to work with the available light, vegetation and viewing position.
Choose Clear Openings When Photographing Gorillas Through Dense Vegetation
One of the simplest ways to improve gorilla photographs is to look for natural openings within the vegetation. Forests may appear thick from a distance, but small gaps between leaves and branches can provide useful viewing opportunities.
Before taking a photograph, observe the surrounding plants. Look for an opening that reveals the gorilla’s face, eyes or upper body. Even a small gap can provide enough space to capture an interesting portrait.
However, avoid rushing to change your position. During gorilla trekking, your guide determines where visitors should stand. Always follow those instructions and work with the available viewing angle.
You can also wait for the gorilla to change its position naturally. An animal that is partly hidden behind a branch may eventually move its head or turn towards an opening. Patience can therefore produce a much clearer photograph without requiring unnecessary movement.
Remember that the goal is not to remove every obstacle. Instead, identify the best natural viewing opportunity while leaving the forest undisturbed.
Use Leaves and Branches for Natural Framing
Dense vegetation does not always have to be an obstacle. In fact, leaves and branches can become valuable creative elements in wildlife photography.
Natural framing involves using objects in the environment to surround or highlight the main subject. For example, a photographer may capture a gorilla looking through a small opening between green leaves. The vegetation creates a frame around the animal and gives the photograph a stronger connection to its habitat.
This technique can also create depth. A slightly blurred leaf in the foreground can make the gorilla appear more clearly separated from the surrounding forest. It helps viewers feel as though they are observing the animal within its natural environment.
Nevertheless, avoid allowing too many branches to cover important features. The gorilla’s face and eyes should remain visible whenever possible. If the vegetation blocks the subject completely, wait for a better opportunity rather than disturbing the plants.
At Safari O’clock, we encourage travellers to appreciate the forest as part of the photography experience. Natural surroundings can make an image more meaningful than a photograph that removes every trace of the animal’s habitat.
Focus on the Gorilla’s Eyes When Photographing Gorillas Through Dense Vegetation
The eyes are among the most important features in wildlife portrait photography. A photograph with sharp, expressive eyes often creates a stronger connection with the viewer.
When photographing gorillas through leaves and branches, focusing can become difficult. The camera may detect nearby vegetation and focus on it instead of the animal. This can leave the gorilla’s face blurred.
To improve accuracy, use a small autofocus area or a single focus point when your camera supports it. Place the focus point over the nearest visible eye. Some modern cameras also offer animal-eye detection, which can help identify and track the gorilla’s face.
However, do not depend entirely on automatic tracking. Thick vegetation can confuse even advanced autofocus systems. Watch the focus indicator and check whether the camera has selected the correct subject.
If the gorilla remains still, you can also use single autofocus to lock focus on its eye. For moving animals, continuous autofocus may provide better results.
Most importantly, prepare your camera before reaching the gorilla family. Learning how to change focus settings in advance allows you to concentrate on the encounter instead of struggling with camera controls.
Adjust Camera Settings for Low Light in the Forest
Dense tropical forests often provide less light than open wildlife environments. Therefore, photographers must choose camera settings that allow them to capture sharp images without using flash.
Start by selecting a wide aperture if your lens supports it. A smaller f-number, such as f/2.8 or f/4, allows more light to reach the camera sensor. It can also create a softer background, helping the gorilla stand out from surrounding vegetation.
Next, consider your shutter speed. Gorillas may remain still for several moments, but they can also move unexpectedly. A shutter speed around 1/250 second can be a useful starting point for relatively still subjects. Faster movement may require 1/500 second or higher.
ISO is equally important. Increasing ISO helps the camera work in darker conditions. Depending on your camera and the available light, ISO 1600, 3200 or higher may be necessary. However, higher ISO values can introduce image noise. Choose a balance that preserves enough detail without making the photograph unnecessarily blurry.
If your camera offers Auto ISO, you can use it to adjust sensitivity as the lighting changes. You should still monitor exposure because the forest contains both dark shadows and bright patches of sunlight.
Never use flash to compensate for poor lighting. Flash photography can disturb gorillas and is prohibited under gorilla viewing rules. Instead, learn to work with available natural light.
Use Exposure Compensation to Preserve Gorilla Fur Details
Mountain gorillas have dark fur, which can make correct exposure difficult. Cameras sometimes struggle to balance the dark animal against bright leaves, open sky or sunlight entering through the canopy.
When a large part of the frame contains dark fur, the camera’s automatic metering may brighten the image too much. This can make the fur appear grey and remove detail from bright areas. In other situations, a bright background may cause the camera to darken the gorilla excessively.
Exposure compensation allows photographers to adjust the camera’s automatic exposure. You can use positive or negative adjustments depending on the scene.
For example, if the gorilla appears too bright and the highlights are losing detail, a small negative adjustment may help. If the animal’s face appears too dark against a bright background, a positive adjustment may improve visibility.
There is no single exposure compensation value that works in every forest condition. Check your camera’s histogram and highlight warnings where available. These tools provide more reliable information than judging brightness from the screen alone.
If your camera supports RAW photography, consider using that format. RAW files preserve more editing flexibility, especially when adjusting shadows and highlights later.
Choose the Right Lens for Photographing Gorillas Through Dense Vegetation
Lens selection can make a major difference during gorilla trekking. The forest environment often requires photographers to capture subjects at different distances while working within strict viewing rules.
A versatile zoom lens can help you photograph both individual gorillas and wider scenes. For example, a 24–105mm lens can capture environmental photographs as well as closer portraits, depending on your position and the applicable viewing distance.
A 70–200mm lens may also be useful when gorillas remain further away. It allows photographers to capture facial details without physically approaching the animals.
However, avoid assuming that a longer lens is always better. Mountain gorillas can sometimes appear close within the permitted viewing area. A very long telephoto lens may make it difficult to capture the entire animal or a wider family scene.
If possible, choose equipment that offers flexibility in both focal length and low-light performance. A lens with a wide maximum aperture can be especially helpful beneath a thick forest canopy.
Smartphone photographers can also capture meaningful images. Use the optical zoom available on your device where possible. Avoid excessive digital zoom because it can reduce image quality.
Most importantly, choose equipment that you can handle comfortably during a forest trek. Heavy equipment can make movement difficult on steep and slippery trails.
Use Different Angles Without Disturbing the Gorillas
A photograph’s angle affects how viewers experience the subject. However, photographers in protected forests cannot move freely to find their preferred position.
Instead, make the most of the viewing position approved by your guide. Small adjustments in camera direction can change how vegetation appears around the animal.
For example, pointing slightly towards an opening may reveal more of the gorilla’s face. A different camera angle may also reduce the number of branches crossing the subject.
When the viewing conditions allow, consider photographing the gorilla at eye level. This perspective can create a more personal connection and highlight facial expressions.
You can also experiment with horizontal and vertical framing. Horizontal images work well when showing a gorilla within its surroundings. Vertical framing can be useful for capturing an animal sitting upright or interacting with vegetation.
Never step away from your designated position or push through plants to achieve a preferred angle. Your guide understands the terrain and the animals’ behaviour. Follow their instructions throughout the encounter.
Look for Natural Light Through the Forest Canopy
Natural light can add atmosphere and beauty to gorilla photographs. In dense forests, sunlight sometimes passes through small gaps in the canopy, creating patches of light across leaves, branches and the forest floor.
These moments can produce beautiful images. For example, a soft ray of sunlight falling across a gorilla’s face may highlight its expression and fur texture.
However, strong differences between bright and dark areas can make exposure difficult. If the background is very bright, the camera may struggle to capture detail in the gorilla’s darker features.
Watch how the light changes and wait for a more balanced moment when possible. Overcast conditions can also be helpful because clouds often produce softer and more even light.
Avoid using artificial flash to brighten dark areas. Respecting the gorillas is more important than achieving a perfectly illuminated photograph.
Capture Gorilla Behaviour Instead of Only Taking Portraits
A good wildlife photograph tells a story. While close-up portraits are attractive, photographs showing natural behaviour can provide even more meaningful memories.
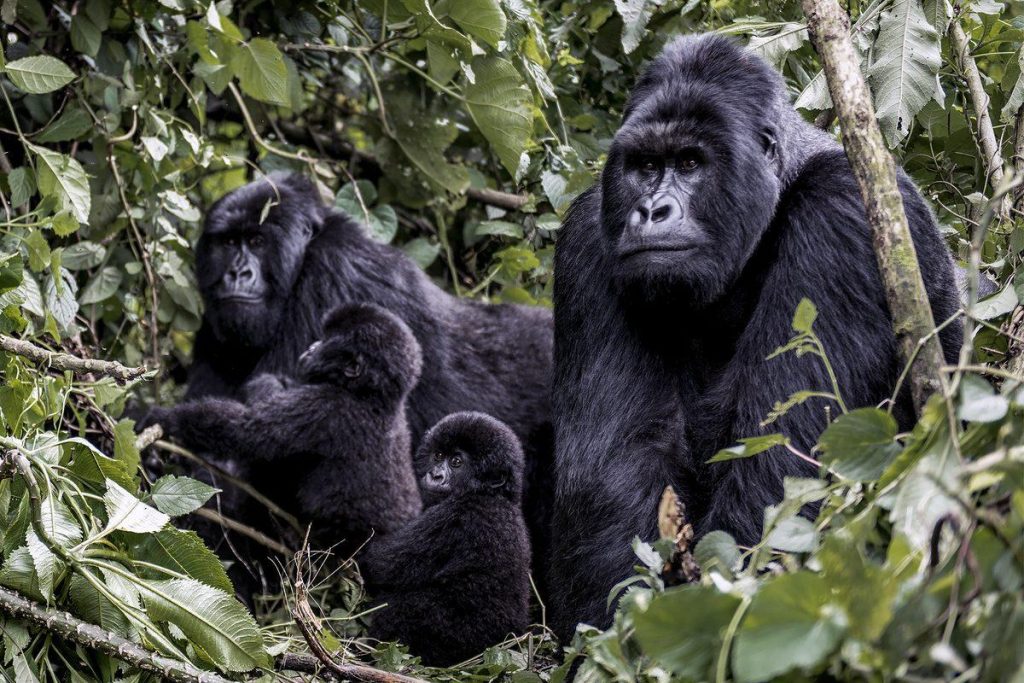
During a gorilla encounter, observe how family members interact. You may see adults grooming each other, young gorillas playing, mothers caring for infants or individuals feeding on vegetation.
These moments reveal the social behaviour of mountain gorillas. They also help photographers create images that communicate more than the animal’s physical appearance.
When vegetation partly covers the scene, look for small details that explain what is happening. A young gorilla holding a leaf, an adult grooming another member or a mother sitting beside her infant can create a compelling photograph.
Use continuous autofocus when photographing moving animals. You can also select burst mode to capture several frames during a short action. However, avoid spending the entire encounter looking through your camera.
Take moments to observe the gorillas directly. This helps you understand their behaviour and anticipate interesting photographic opportunities.
Be Patient When Photographing Gorillas Through Dense Vegetation
Patience is essential when photographing wildlife. Gorillas do not arrange themselves for photographs, and they rarely remain in one position for long.
Sometimes, a gorilla may sit behind several branches for an extended period. Instead of becoming frustrated, observe its movements and wait for a clearer view.
The animal may eventually turn its head, move towards an open area or change its feeding position. These natural movements can create opportunities for better photographs.
Listen carefully to your guide and tracker. They understand the forest environment and can help visitors anticipate gorilla movements. Their instructions also help protect both the animals and the trekking group.
Avoid constantly checking your camera screen after every photograph. Reviewing too many images can distract you from the encounter. Instead, check a few important photographs and remain aware of the gorilla family’s movements.
Safari O’clock encourages visitors to balance photography with the experience itself. Sometimes, the most memorable moment is one that you enjoy without looking through a camera.
Protect Your Camera Equipment in Wet Forest Conditions
Mountain gorilla habitats can experience changing weather conditions. Rain, mist, humidity and muddy trails may affect photography equipment during a trek.
Therefore, prepare your camera before entering the forest. A waterproof camera cover or rain sleeve can protect the equipment when showers begin. Keep a clean microfiber cloth available for wiping moisture from the lens.
You should also carry spare batteries because low temperatures, camera use and frequent image capture can affect battery performance. Store spare batteries in a dry, accessible place.
Avoid changing lenses unnecessarily in wet or dusty conditions. Doing so may expose the camera sensor to moisture and dirt. If you must change lenses, follow the equipment manufacturer’s recommendations and protect the camera from the weather.
Keep your camera strap secure while walking. Steep and muddy forest trails require careful movement, and equipment should never interfere with your balance.
A small, comfortable camera bag is often more practical than carrying several heavy accessories. Choose equipment that meets your photography needs without making the trek unnecessarily difficult.
Follow Responsible Photography Rules During Gorilla Trekking
Responsible photography is an important part of every gorilla trekking experience. Mountain gorillas are endangered animals, and their health and safety must always come before visitors’ photography interests.
Visitors must follow the applicable rules established by park authorities. These include maintaining the required viewing distance, listening to guides and avoiding actions that could disturb the gorillas.
Do not touch, feed, call or imitate gorillas to attract their attention. Never break branches or remove leaves to create a clearer camera view. Such actions can disturb the animals and damage their habitat.
Flash photography is also prohibited during gorilla encounters. Switch off the camera flash before entering the viewing area. Check other settings that may activate a bright autofocus-assist light.
In addition, follow the current health precautions provided by park authorities. Mountain gorillas are vulnerable to human diseases, so visitors should avoid trekking when sick and follow any applicable mask or hygiene requirements.
If a gorilla moves closer than expected, follow your guide’s instructions. Do not move towards it for a photograph or attempt to maintain eye contact.
At Safari O’clock, we believe responsible tourism helps preserve the extraordinary wildlife experiences that travellers enjoy. Protecting gorillas today helps ensure that future generations can also appreciate these remarkable animals.
Common Mistakes to Avoid When Photographing Gorillas Through Dense Vegetation
Even experienced photographers can struggle with thick vegetation. However, recognising common mistakes can help you improve your results.
One common mistake is focusing on leaves instead of the gorilla. When branches appear close to the lens, autofocus may select them as the main subject. Use a smaller focus area and check that the camera has selected the animal’s eye.
Another mistake is increasing ISO without checking exposure. Although higher ISO can help in dark conditions, unnecessary increases may introduce image noise. Adjust aperture and shutter speed before raising ISO more than necessary.
Some visitors also use excessive zoom. This can make it difficult to capture the animal’s surroundings and may produce tightly cropped images that lose important details. Choose a focal length that suits the subject and the available viewing space.
Poor preparation is another challenge. Trying to learn camera settings during the gorilla encounter wastes valuable time. Practise using your camera in similar lighting conditions before the trek.
Finally, avoid moving vegetation or changing your position without permission. A clear photograph is never more important than wildlife welfare.
Final Thoughts on Photographing Gorillas Through Dense Vegetation
Photographing gorillas through dense vegetation requires patience, preparation and an understanding of the forest environment. Thick leaves and branches may create challenges, but they can also add depth, atmosphere and natural beauty to wildlife photographs.
By identifying clear openings, using natural framing, focusing on the eyes and adjusting camera settings for low light, visitors can improve their photography results. Choosing suitable lenses and observing natural gorilla behaviour can also help create meaningful images.
Most importantly, always follow the instructions of your guide and respect the rules of protected areas. Never disturb vegetation, approach gorillas beyond the permitted distance or use flash to improve a photograph.
With Safari O’clock, your gorilla trekking adventure is an opportunity to experience nature responsibly. Whether you are visiting Bwindi Impenetrable National Park or Mgahinga Gorilla National Park, every encounter offers a chance to appreciate the beauty of mountain gorillas and their forest home.
Travel with Safari O’clock, capture the beauty of the wild and preserve memories while protecting the wildlife that makes every adventure special.