- DIRECT CONTACTS:
- +256394517569
- tours@safarioclock.africa

How to Take Sharp Gorilla Photos in Low Forest Light

Choosing a Lens for Gorilla Tracking in Dense Forest
November 11, 2026
Photography Etiquette During a Mountain Gorilla Encounter
November 11, 2026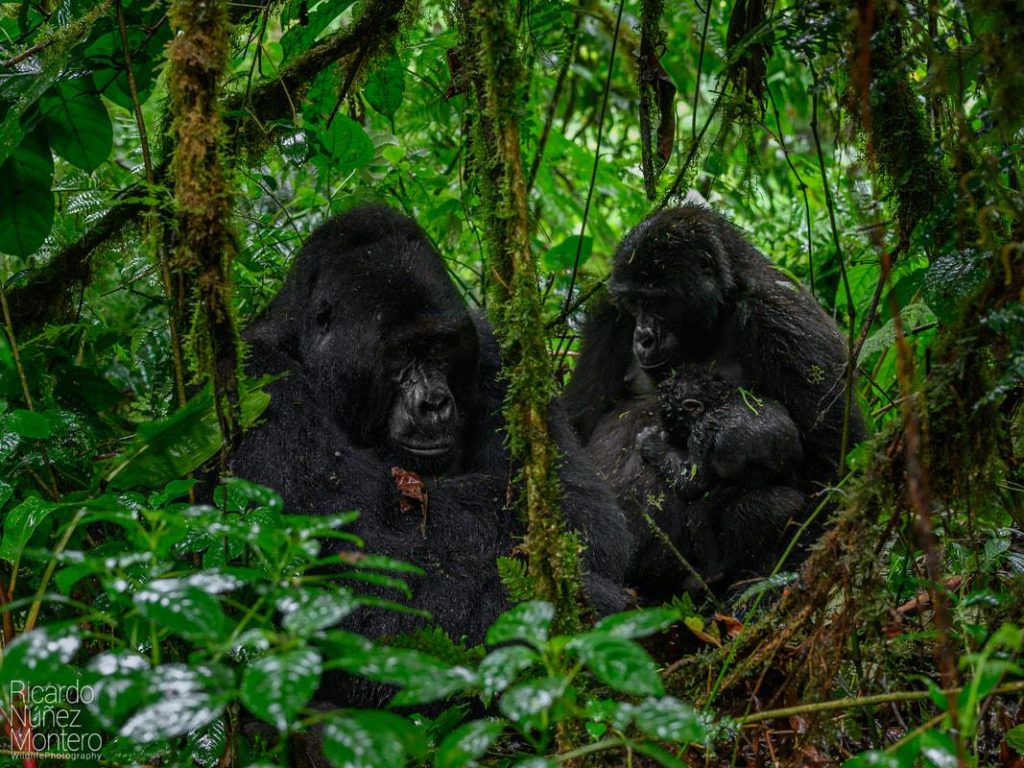
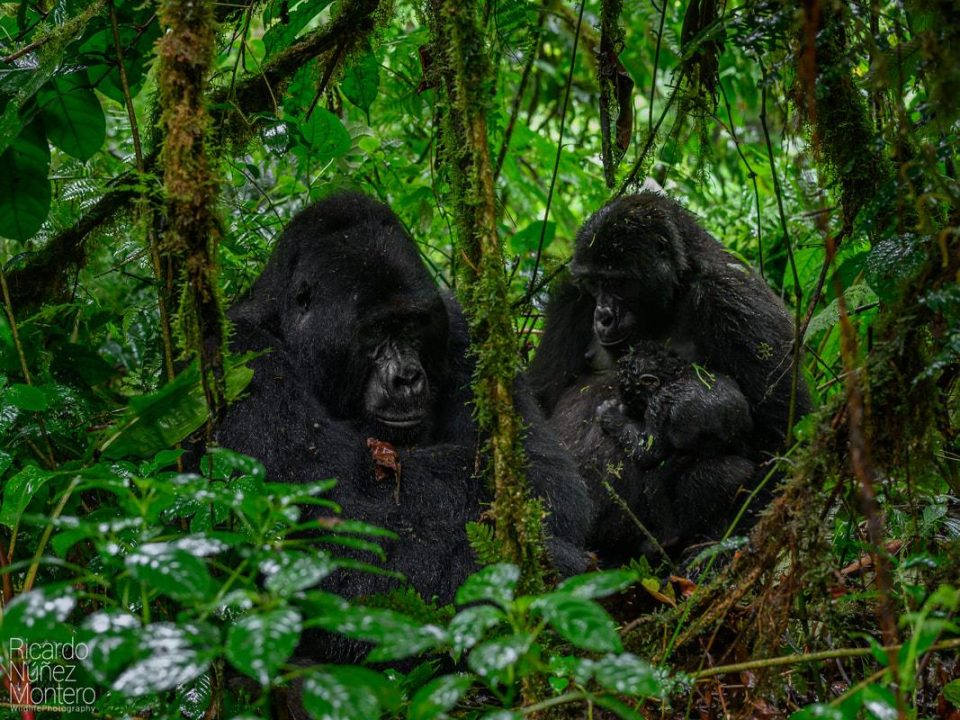
Photographing mountain gorillas in their natural habitat is one of the most memorable experiences of a Rwanda or Uganda safari. However, getting clear photographs in a dense forest is not always easy. Thick vegetation blocks sunlight, branches create shadows and gorillas often move between darker and brighter areas. As a result, even experienced photographers may struggle to capture sharp images.
Low forest light creates two common problems. The camera may produce blurry photographs because the shutter speed is too slow. Alternatively, the camera may focus on leaves and branches instead of the gorilla. Both problems can affect the final image.
Fortunately, the right preparation can make a significant difference. Photographers can improve their results by adjusting shutter speed, aperture, ISO and autofocus settings. They can also learn how to hold their cameras steadily and work with the available natural light.
At Safari O’clock, we encourage travellers to prepare their photography equipment before entering the forest. You do not need the most expensive camera to capture meaningful memories. Instead, you need to understand your equipment and know how to use it in challenging conditions.
Why Taking Sharp Gorilla Photos in Low Light Is Challenging
Mountain gorillas live in forest environments with thick vegetation and a dense canopy. In destinations such as Bwindi Impenetrable National Park and Volcanoes National Park, sunlight does not always reach the forest floor directly. Therefore, some photography areas remain dark even during the day.
The lighting can also change quickly. One moment, a gorilla may sit in an open patch of sunlight. A few seconds later, it may move beneath thick leaves or behind tree branches. These changes can affect your camera’s exposure and autofocus.
Movement creates another challenge. Gorillas do not remain perfectly still throughout an encounter. They feed, walk, interact with family members and care for their young. Even small movements can create blur when the camera uses a slow shutter speed.
Furthermore, photographers must work within strict wildlife viewing rules. In Rwanda, visitors must maintain a minimum distance of seven metres from gorillas. Flash photography is also prohibited. Therefore, you cannot rely on flash to brighten a dark scene. You must learn to work with natural light and suitable camera settings.
Choose the Right Shutter Speed for Sharp Gorilla Photos
Shutter speed is one of the most important settings for sharp wildlife photography. It determines how long your camera sensor receives light when you take a photograph. A slow shutter speed allows more light into the camera. However, it also increases the risk of motion blur.
A faster shutter speed reduces the time the camera records movement. This helps freeze the subject and produce clearer images. During gorilla tracking, this becomes especially important when photographing feeding, walking or playful young gorillas.
For relatively still gorillas, you can begin by testing speeds around 1/125 or 1/250 second. If the gorilla moves, try 1/500 second or faster. These are starting points rather than fixed rules. The best setting depends on the animal’s movement, your lens and the available light.
However, faster shutter speeds reduce the amount of light entering the camera. You may need to increase your ISO or use a wider aperture to maintain a good exposure.
Use a faster shutter speed for moving gorillas
Gorillas often move naturally during the viewing session. A young gorilla may play, climb or interact with another family member. A silverback may also change position while resting or feeding.
In these situations, a shutter speed that works for a stationary animal may not be fast enough. Start around 1/500 second and adjust according to the movement. For faster action, you may need 1/800 or 1/1000 second.
Nevertheless, avoid using an unnecessarily fast shutter speed when the forest is very dark. Your camera may struggle to capture enough light. Instead, balance shutter speed with aperture and ISO.
Avoid camera shake when using long lenses
Long telephoto lenses make distant subjects appear closer. However, they also make small camera movements more noticeable. Even a slight hand movement can reduce image sharpness.
Hold your camera firmly with both hands. Support the lens with your left hand and keep your elbows close to your body. You can also lean gently against a stable surface if your guide permits it and the surroundings allow it.
Image stabilisation can help reduce blur caused by camera movement. Some cameras offer stabilisation inside the camera body, while others use stabilisation within the lens. Certain systems combine both features.
Remember that stabilisation does not freeze a moving gorilla. You still need a suitable shutter speed to capture animal movement clearly.
Adjust Your Aperture for Better Forest Photography
Aperture controls the size of the opening inside your lens. It determines how much light reaches your camera sensor. A wider aperture allows more light into the camera, which can help in dark forest conditions.
Camera displays show aperture values using f-numbers. For example, f/2.8, f/4 and f/5.6 are common settings. A smaller f-number represents a wider opening.
A lens with an f/2.8 maximum aperture can collect more light than an f/5.6 lens at the same focal length. This can help you use a faster shutter speed without making the photograph too dark.
However, a wider aperture also creates a shallower depth of field. This means that only a smaller area of the scene may appear sharply focused. When photographing a gorilla’s face, this can create a beautiful portrait. However, it may become difficult when photographing several gorillas at different distances.
When to use a wide aperture
A wide aperture works well when you want to photograph an individual gorilla in low light. It allows more light into the camera and can separate the subject from a busy background.
For example, you could begin with f/2.8 or f/4, depending on your lens. Focus carefully on the gorilla’s eye or face. Then check the photograph to confirm that the important details are sharp.
However, do not automatically choose the widest aperture in every situation. If several gorillas appear at different distances, a slightly narrower aperture may keep more of the scene in focus.
Balance aperture and depth of field
Depth of field describes how much of your photograph appears acceptably sharp. A wide aperture creates a shallow depth of field. A narrower aperture keeps more areas in focus, although it allows less light into the camera.
During gorilla tracking, you may photograph a single silverback, a mother with her infant or an entire family group. Each scene may require a different approach.
For a close portrait, a wider aperture can help isolate the gorilla. For a group photograph, consider a narrower aperture if the light allows it. Check your focus carefully before taking several photographs.
Increase ISO to Capture Sharp Gorilla Photos in Dark Areas
ISO controls how sensitive your camera sensor is to light. Increasing ISO allows your camera to use faster shutter speeds in darker environments. This can help reduce blur when photographing gorillas beneath thick vegetation.
For example, your camera may struggle to expose a photograph at ISO 100 in a dark forest. Increasing the ISO to 800, 1600 or 3200 may allow you to use a faster shutter speed.
However, higher ISO values can introduce digital noise. Noise appears as grain or unwanted texture in a photograph. The amount of noise depends on your camera sensor, image size and exposure conditions.
Therefore, learn how your camera performs at different ISO levels before your trek. Take test photographs in a dim room or shaded outdoor area. Compare the results and identify the highest ISO setting that still gives you acceptable image quality.
Most importantly, do not sacrifice a sharp photograph simply to keep ISO low. A slightly noisy but well-focused photograph is often more useful than a clean image ruined by motion blur.
Use Auto ISO in changing forest light
Auto ISO allows the camera to adjust ISO automatically as lighting conditions change. This feature can be useful during gorilla tracking because the forest environment rarely offers consistent light.
You can select your preferred shutter speed and aperture. The camera then adjusts ISO to maintain the correct exposure.
If your camera supports minimum shutter speed settings for Auto ISO, use them to reduce the risk of blur. The exact controls differ between camera brands and models.
Before your trek, practise using this feature. You should understand how to check the exposure and change settings quickly without distracting yourself during the encounter.
Use Accurate Autofocus for Sharp Gorilla Photos
Correct focus is just as important as exposure. A photograph may have good brightness and a fast shutter speed but still look unclear if the camera focuses on the wrong subject.
Dense forests create difficult autofocus conditions. Leaves, branches and vines may appear between you and the gorilla. As a result, the camera may focus on the vegetation instead of the animal.
To improve your results, learn how your camera’s autofocus system works before travelling.
Focus on the gorilla’s eyes
The eyes often create the strongest connection in a wildlife portrait. Therefore, try to focus on the nearest visible eye when photographing an individual gorilla.
Some modern cameras include animal eye detection. This feature can identify an animal’s eye and help the camera maintain focus. If your camera supports it, practise using the feature before your trip.
However, eye detection may struggle when vegetation blocks the gorilla’s face. You may need to switch to a smaller focus area or select the subject manually.
Always review your photographs when possible. Check whether the eye and face appear sharp rather than assuming the camera has focused correctly.
Use continuous autofocus for moving gorillas
Continuous autofocus helps the camera adjust focus while the subject moves. Camera brands use different names for this feature. Canon commonly calls it Servo AF, while Nikon and Sony use AF-C.
This mode can help when photographing gorillas that walk, feed or interact with other members of their family.
For stationary subjects, single autofocus can also work well. Choose the mode that matches the scene and your camera’s capabilities.
If your camera supports animal subject tracking, practise with it before the trek. Learn how to keep the focus area on the gorilla without constantly changing settings.
Choose a Suitable Lens for Low Forest Light
Your lens plays an important role in the quality of your photographs. Some lenses perform better in low light because they have wider maximum apertures. Others offer longer focal lengths that help photograph subjects from a distance.
A 70–200mm lens with an f/2.8 aperture can provide a useful combination of reach and light-gathering ability. A 70–200mm f/4 lens may also work, although it allows less light at its maximum aperture.
A 24–70mm lens can help when gorillas appear close or when you want to capture wider family scenes. Meanwhile, a 100–400mm lens offers more reach but may become difficult to use in very dark areas, depending on its maximum aperture.
There is no universal best lens for every gorilla trek. Consider your camera body, lens weight, available light and photography experience.
Safari O’clock encourages travellers to test their equipment before departure. You should know how quickly your lens focuses and how it performs at different focal lengths. This preparation can save valuable time during the limited viewing session.
Hold Your Camera Correctly in the Forest
Camera handling affects image sharpness more than many beginners realise. Poor grip, tired arms and awkward body positions can introduce camera shake.
Gorilla tracking may involve steep slopes, muddy trails and thick vegetation. You may also spend time standing or crouching while observing the animals. Therefore, choose a camera setup that you can handle comfortably.
Use both hands when taking photographs. Keep one hand under the lens and the other on the camera body. Press the shutter gently instead of pushing it suddenly.
If you need extra stability, place your feet firmly on the ground. Avoid stretching your arms too far forward. You can also rest your elbows against your body when the position allows.
A monopod may help during some wildlife photography situations. However, equipment must never obstruct other visitors, damage vegetation or interfere with park instructions. Follow your guide’s directions about where and how to stand.
Work With Natural Light Instead of Using Flash
Low forest light may tempt photographers to use flash. However, flash photography is prohibited during Rwanda gorilla tracking. Visitors should prepare their cameras to work with available natural light.
Instead of using flash, increase ISO, open the aperture or adjust the shutter speed. You can also look for naturally brighter areas when the gorillas are already visible there.
However, never ask guides to move gorillas or disturb vegetation simply to improve the lighting. The animals’ comfort and safety must always come first.
Natural light can also create attractive photographs. Soft light may reveal facial details, fur texture and expressions without harsh shadows. Take time to observe how the light falls on the animal before choosing your composition.
Take Sharp Gorilla Photos Through the Vegetation
Forest vegetation can make photography frustrating. Leaves, branches and vines may cover parts of a gorilla’s face or body. Sometimes the camera focuses on the nearest leaf instead of the animal.
When this happens, adjust your camera’s focus area. A smaller focus point may help you select the gorilla through gaps in the vegetation.
You can also change your shooting angle slightly if your guide permits it. However, do not move outside the designated visitor group or push branches aside. Ask your guide for assistance if vegetation blocks your view.
Remember that the forest is the gorillas’ natural home. Your photograph does not need to show every part of the animal. A clear portrait through natural vegetation can still tell a beautiful story.
Prepare Your Camera Before the Gorilla Trek
A well-prepared camera allows you to spend more time observing the gorillas and less time searching through menus.
Before leaving your accommodation, check your battery level and memory card space. Carry a spare battery and an additional memory card if possible. Cold and damp conditions can also affect equipment performance, so protect your camera from rain and moisture.
Set your camera to a suitable starting mode before entering the forest. For example, Aperture Priority with Auto ISO can work well when light changes frequently. Alternatively, Shutter Priority can help when you want to control movement.
Confirm that flash is switched off. Also, practise changing ISO, shutter speed, focus mode and exposure compensation without looking through complicated menus.
A few test photographs in low light can help you identify problems before the actual trek. Check your focus, image brightness and shutter speed. If the photographs look blurry, adjust your settings and try again.
Common Mistakes That Make Gorilla Photos Blurry
Even good equipment cannot guarantee sharp photographs. Small mistakes can affect the final result, especially in difficult forest conditions.
One common mistake is using a shutter speed that is too slow. Photographers sometimes lower shutter speed to brighten an image. However, this can create blur when the gorilla moves or the camera shakes.
Another mistake is keeping ISO too low. Although low ISO can reduce digital noise, it may force the camera to use a slow shutter speed. A higher ISO can produce a more useful result in dark conditions.
Some photographers also depend too much on autofocus. When leaves cover the animal, the camera may focus on the wrong area. Check your focus point and make adjustments when necessary.
Finally, avoid changing several settings without understanding their effect. Practise before the trek so you can make quick and confident adjustments.
Respect Gorilla Tracking Rules While Taking Photographs
Good wildlife photography should never interfere with animal welfare. Mountain gorillas are vulnerable to human diseases and disturbance. Therefore, visitors must follow the instructions given by park authorities and guides.
In Rwanda, official guidance requires visitors to maintain at least seven metres from gorillas. Viewing time is limited to one hour, and flash photography is not permitted. Visitors must also keep their voices low and avoid sudden movements.
Never move closer to a gorilla to improve your composition. Do not touch the animals, block their movement or push vegetation aside without guidance. If a gorilla approaches, remain calm and follow your guide’s instructions.
These rules protect both visitors and gorillas. They also help ensure that future travellers can enjoy responsible wildlife encounters.
Safari O’clock encourages every traveller to place conservation before photography. A beautiful photograph is valuable, but a safe and respectful encounter matters much more.
Final Thoughts on Taking Sharp Gorilla Photos in Low Forest Light
Taking sharp gorilla photographs in dense forest requires preparation, patience and an understanding of your camera. Low light, moving animals and thick vegetation can create challenges. However, the right combination of shutter speed, aperture, ISO and autofocus can improve your results.
Practise using your camera before the trek. Learn how to focus on the gorilla’s eyes, adjust exposure and hold your equipment steadily. Most importantly, prepare to work without flash and respect all park instructions.
You do not need to capture hundreds of photographs to remember your encounter. Sometimes, one well-composed image can preserve the experience beautifully.
With proper preparation and responsible behaviour, Safari O’clock can help make your gorilla tracking journey both memorable and respectful of the wildlife you have travelled to see.